In this series of articles, we take you through some of the basic steps to ensure you get the most from the Revit families available in the BIM Centre of MyPortal. In this third article, we look at using reducers and the Wavin validation view.
These two features will help you to get your project into an “as-built” level of detail which means more accurate space allocation, better clash detection and overall cost-effectiveness in your BIM project.


Working with reducers in Revit

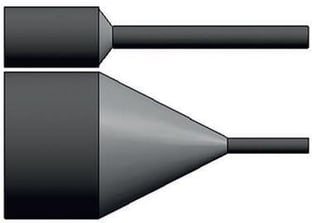
In this image, you can see how Revit standard piping system deals with reducers. As you can see, the reducer is always a single piece, is very short and is always centric which isn’t normally the case in real life.
Using the Wavin system, it will show you the actual number of reducers required including any couplers/adaptors or bends where necessary. The image below shows a pipe reducing from 160mm down to 82mm using two reducers and a coupler.

How to draw a reducer using Wavin’s Revit families
To draw a reducer, simply draw a length of pipe and change the diameter size to create a custom fitting (Step 1 below).
Revit software always includes reducers as centric items. Our content allows you to apply eccentricity using a check box in the properties panel (Step 2).
You can then add a coupler if required using the properties box (Step 3) and finally use the rotate function in Revit to create a level soffit (Step 4).
Using Wavin's validation view
We have created a View template which will hide the majority of the building elements to enable you to focus on the services.
To open the Wavin validation view, click on 3D views in your project browser and select Wavin Validation view.
If you don’t have the Validation view, we recommend you watch this tutorial video on importing Wavin content packages in Revit.
The green colour highlights non-Wavin sanitary products.
The orange colour highlights that the pipe segment is longer than is available in that product range. In this instance, it can be fixed by using the Split Element tool in Revit or with its shortcut “SL” to split pipes into separate elements. Once this is done, the orange colour will disappear.
The red colour is used to label the custom or non-functioning fittings and this function is very useful to find left over custom fittings in a project and fix them. In the image below the eccentricity needs to be applied to the reducer. Once this is done, the red colour will disappear.
Need more information? Watch the tutorial below.


